

After my vegetable beds were built (see the posts here and here for details), I set about planting some vegetables to fill the beds. Of course, planting crops meant I needed a way to identify them so this called for a DIY project for some plant markers. I used some items I had readily available around the house, which made these markers absolutely free and upcycled. Ahhh… my favorite type of project!
Here are the instructions:

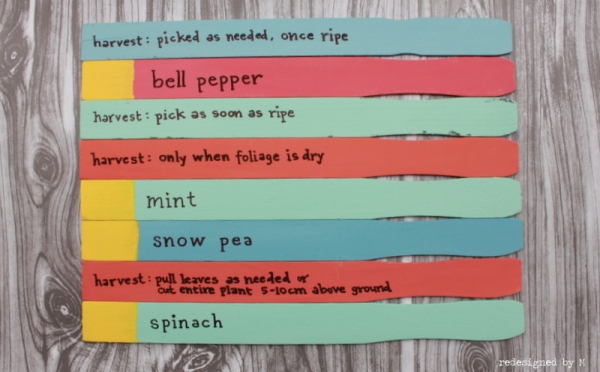
It was important to me to have some sort of instruction on how to harvest the plants on the marker somewhere as I won’t be the only person tending the garden. (We also have rental tenants in our basement unit who will have access to the veggies; and don’t forget my husband gets to pick them as well!)
As I wanted my plant markers in pastel colors, I had to customize a couple of my own colors. The mint green color was found at Home Depot in the mistints section, so I’m sorry I don’t have a tutorial on how to mix that color.
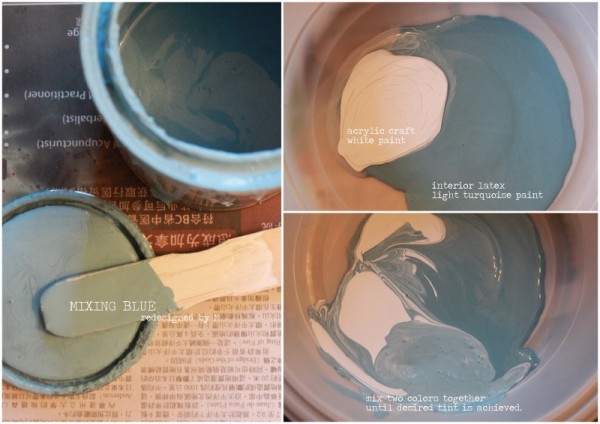
Fun Fact: This blue shown here was used to paint my pantry.
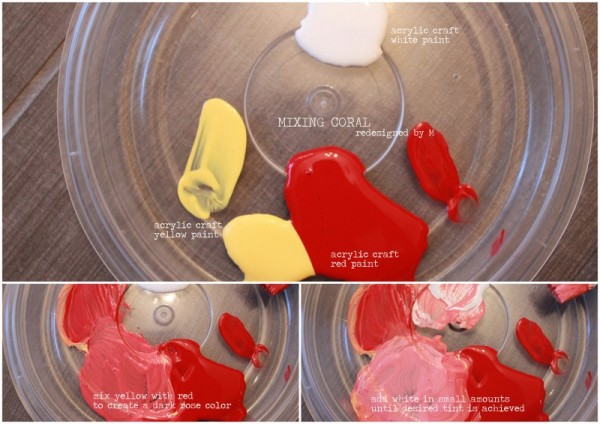
Budget Tip: The acrylic craft paints you see here were sourced from Dollar Tree.
No need to shell out big bucks for paint!
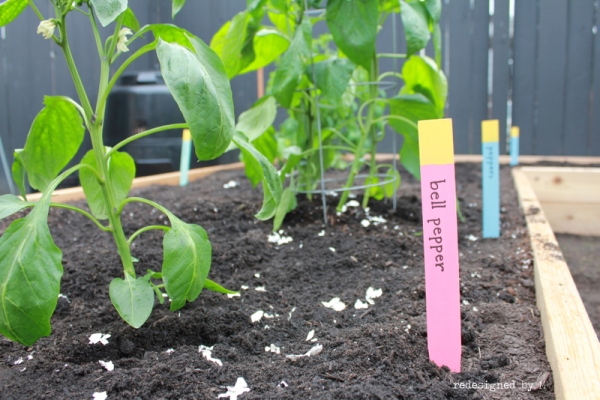
I absolutely ADORE how these markers turned out!
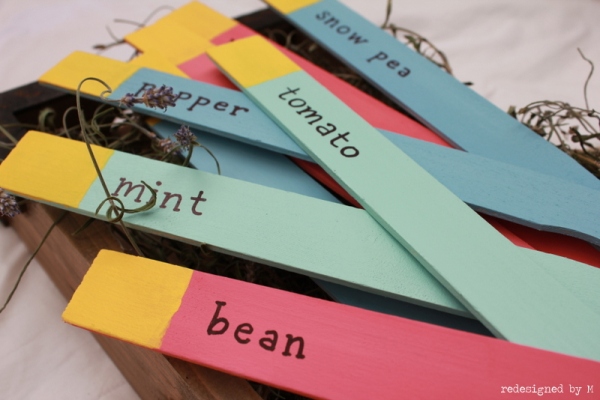
I especially love how the markers add a splash of unexpected color in an otherwise green, brown, and black space. Makes them much easier to spot.
What do you think of my new plant markers made from paint stir sticks? Do you have some fun plant markers of your own to share? Let me know in the comments below!
Total time: It took me a total of 2.5 hours to paint about 15 markers and to mix the colors in between. This does not include dry time.
Total cost: A gallon of the mint green paint cost $9+tax from Home Depot, of which I only used a tiny fraction. I’ll be using this paint for other projects, so I’m not counting this into the total cost of this one. The other paints were already in my collection and paint stir sticks are always free. So my plant markers were all free, free, and free! **Happy dance**
Linking to:
Living Well, Spending Less
Made In A Day
A Blossoming Life
DIY Show Off
Tatertots & Jello
Nifty Thrifty Things
52 Mantels
All Things With Purpose
The Shabby Nest
Design, Dining, & Diapers
Chic On A Shoestring Budget
I Gotta Try That
C.R.A.F.T.
Skip To My Lou
Keeping It Simple
Coastal Charm
Twigg Studios
Home Stories A to Z
Elizabeth & Co
Homework
The Blackberry Vine
The Dedicated House
Twelve O Eight
The Charm of Home
Twitter | bloglovin’ | Instagram | Pinterest


ontheupcyclemom
/ July 10, 2013These are great and looks like they will hold up well outside : ) I did the wine cork markers, but I think I will try these next year 🙂
Redesigned By M
/ July 10, 2013I just had a look through your blog for the wine cork markers. They look so cute! If you do try the stir sticks, let me know how it goes! ~M.
ontheupcyclemom
/ July 10, 2013I sure will! Thanks for the awesome idea!
Danielle 🙂
Inge Hooker
/ July 12, 2013So Cute. Now I want a garden 🙂
Ruth @ Living Well Spending Less
/ July 12, 2013These are so cute and look so easy to make! Thank you for linking up to the Thrifty Thursday link party!
Redesigned By M
/ July 12, 2013Thank you, Ruth! They WERE easy to make! They could also be painted with various patterns, but I liked the color block look. So glad you stopped by today and thanks for hosting the party! ~M.
Redesigned By M
/ July 12, 2013Gardening has been so much more fun and rewarding than I ever imagined! Have you gardened before?
redagapeblog
/ July 12, 2013Practical and cute!!
Redesigned By M
/ July 13, 2013Thank you!
KaT & Kiddo
/ July 13, 2013These are super cute!! I look forward to your posts!
sedrate
/ July 14, 2013For my first forays into vegetable gardening I had coloured index cards labeled by month stuck beside the back door so I’d know what I was doing.
I use a paint stir stick to mix my eco safe stain removing mixture and dunk the clothes in it because it’s quite hot.
This is still a really pretty and practical idea. Maybe you could do the same and shove them in a bookcase to divide the books. “His” “Hers” “Gardening” “The Hunger Games” etc.
Redesigned By M
/ July 14, 2013Hiya! I’m not sure I’m clear as to which idea is the pretty and practical one. Do you mean to use stir sticks to divide my books into categories? Could you clarify? Thanks!
sedrate
/ July 15, 2013Yeah, that’s what I’d meant, have the stir sticks sticking out from in between the books, labeling the categories.
sedrate
/ July 15, 2013The sticks would look really pretty in any garden though. I’d need it for flowers since I can barely tell a begonia from a marigold.
Redesigned By M
/ July 15, 2013Oh, that does sound like a lovely idea! Thanks for the tip!
Redesigned By M
/ July 15, 2013I agree! Be sure to link up if you decide to make any of your own!
Redesigned By M
/ July 16, 2013Thank you so much! I’ve got lots more ideas to be posted!
jami
/ July 22, 2013Love the harvesting instructions on the back! GENIUS!!!! Thank you so much for linking up to the Tuesday To Do Party!!! Can’t wait to see what you share this week!!
Smiles!
Jami
The Blackberry Vine
http://www.blackberryvine.blogspot.com
Redesigned By M
/ July 22, 2013Thank you! I love making things that are both pretty AND practical. =) ~M.