

This post has moved to my new site at Planq Studio. Please visit me there to find out how to make this fun project and get inspiration for loads of other projects too!
This post has moved to my new site at Planq Studio. Please visit me there to find out how to make this fun project and get inspiration for loads of other projects too!
Posted by Redesigned By M on November 13, 2013
https://redesignedbym.wordpress.com/2013/11/13/staging-secrets-exposed/

Several months ago… possibly even more than a year now… I made a calendar out of a picture frame and some paint chips for our command center in the kitchen. It looked like this:

It served us well for many months. My husband did a good job at changing it out every month, but I soon grew bored of it. It was time for a change and here are the reasons why:

I’m actually in the midst of completely organizing my command center. It never got to the point of completion after this calendar was made and we have much need for it to be finished now. And you know me… a reorganization project often calls for a new look and new design direction. I can’t quite say what my design intent is for the new command center… maybe Parisian chic? I think this new look will go nicely with the white cabinets and black trim I eventually want to make over my kitchen with. This calendar was made of leftover material from various projects in the efforts of being cost effective and environmentally friendly.

After my wedding, I had so much burlap left over from all the decor that I’m still finding ways that I can reuse it. (I also used some of the burlap for this project here.) It may be weird that I chose to use plastic strapping to lay out the calendar grid for this project, but it was what I had on hand. I guess tape would be a perfect alternative, but I didn’t want to put this project on hold just so I could run around town looking for the right colored tape in the right width. So, the moral of this story, kiddos, is to use what you have.

The steps are really simple, but the non-adhesiveness of the plastic strapping made for a lengthy project. Here’s the final result:

xx

Ahhh… no more crazy montage of colors! This burlap and white is a much more refreshing look, especially hanging on a chalkboard wall. More on that wall later…!
The glass of the frame protects the materials nicely and makes a great surface to use for dry erase pens or glass markers (my chalkboard markers double as glass markers – see where else I used the chalkboard markers here and here). The glass just gets wiped down with a wet cloth when using glass markers. Overhead projector pens can also be used on glass.
As always, please leave your feedback in the comments below! I love hearing from my readers!
Total time: This took place over the course of one Family Guy, one American Dad, and one whole movie of Win A Date With Tad Hamilton. (The movie just came on after the cartoons and I was too lazy to get up and change the channel.) That’s a total of 3 hours. (In comparison, the paint chip calendar took me all of half an hour.)
Total cost: The frame (from Ikea) cost me $11 after the 50% sale price. The plastic strapping and burlap were leftover materials from other projects. After taxes, the total for this calendar was $12.31.

Linking To:
52 Mantels
All Things With Purpose
Frugality Gal
Living Well Spending Less
The Shabby Creek Cottage
Posted by Redesigned By M on October 16, 2013
https://redesignedbym.wordpress.com/2013/10/16/repurposed-diy-calendar-made-of-found-objects/

I’ve been coveting a bold striped maxi skirt this season. I even went shopping for one, but it seems the stores are only carrying maxi skirts with diagonal stripes. I was very insistent that the stripes be horizontal. And bold. No wimpy stripes for me!
Then one day just before Fourth of July, while shopping the $1 flip flop sale at Old Navy, I saw several [cheap] tank tops stacked on the tables. The price was so great that I decided I probably needed to refill my dwindling supply of tank tops. But then…. as I fondled the material…. a lightbulb went off in my head.
Maxi skirt!!!!
So, I rummaged for two contrasting colors that would be awesome together. And I bought three tank tops in XL just to make sure I had enough material to work with. The price would be the same whether I got a small or an XXL, so why not get the larger size? It turns out I was spot on in getting the larger size because I needed it to fit around my large a$$.
Here’s how I made the skirt:

And voilà!

I paired the skirt with a navy tank top (also from Old Navy, but in a different style), threw on a long chain necklace and a few baubles with strappy sandals, and I had an instant go-to outfit that was effortless chic! This skirt was so comfortable that I put it on for the mini photo shoot and didn’t take it off for the rest of the day. I love that it’s a T-shirt material – so comfy!

A few other tips I didn’t include in the photo tutorial:

To determine how to lay out the stripes:

What do you think? Do you love it? (Please say you do!)
Total time: 2.5 hours from start to finish. Includes sketching and planning time, which only took about 15 minutes.
Total cost: Each tank top was $3.50 with an additional discount for spending over a certain amount (special promotion for the day). As the discount per item was minimal, I’ll just omit the sales tax from the final total to even things out. The elastic band was recycled from another article of clothing, so that didn’t cost anything. I wish I had navy thread on hand, but I didn’t so I used black thread of which I had mass quantities. Final tally was $10.50!! Woohoo! Quite a good price for getting EXACTLY what I want. Yay!
Related Posts:
Tweed Skirt
Infinity Scarves
Turn Scarves Into Boot Socks
Linking To:
52 Mantels
All Things With Purpose
Chic On A Shoestring Decorating
Common Ground
Crafts-A-La-Mode
Crafty Confessions
Daisy Cottage Designs
DIY Show Off
Elizabeth & Co
French Country Cottage
Homecoming
Homework
I Should Be Mopping The Floor
Knick of Time
Lemon Tree Dwelling
Living Well, Spending Less
Made In A Day
My Uncommon Slice of Suburbia
Nifty Thrifty Things
Redfly Creations
Somewhat Simple
Southern Lovely
The Blackberry Vine
The Dedicated House
The Girl Creative
The Shabby Creek Cottage
The Shabby Nest
The Thriftiness Miss
The Thrifty Groove
The Winthrop Chronicles
Thirty Handmade Days
Twigg Studios
Wife In Progress
Posted by Redesigned By M on July 31, 2013
https://redesignedbym.wordpress.com/2013/07/31/repurposed-diy-striped-maxi-skirt/

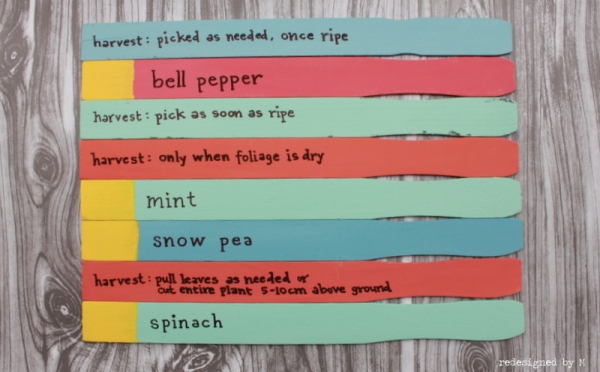
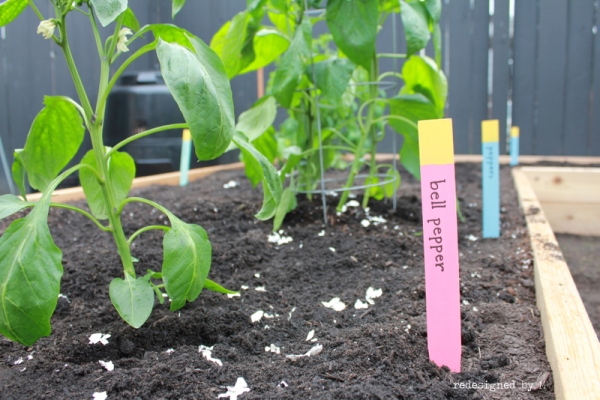
After my vegetable beds were built (see the posts here and here for details), I set about planting some vegetables to fill the beds. Of course, planting crops meant I needed a way to identify them so this called for a DIY project for some plant markers. I used some items I had readily available around the house, which made these markers absolutely free and upcycled. Ahhh… my favorite type of project!
Here are the instructions:

It was important to me to have some sort of instruction on how to harvest the plants on the marker somewhere as I won’t be the only person tending the garden. (We also have rental tenants in our basement unit who will have access to the veggies; and don’t forget my husband gets to pick them as well!)
As I wanted my plant markers in pastel colors, I had to customize a couple of my own colors. The mint green color was found at Home Depot in the mistints section, so I’m sorry I don’t have a tutorial on how to mix that color.
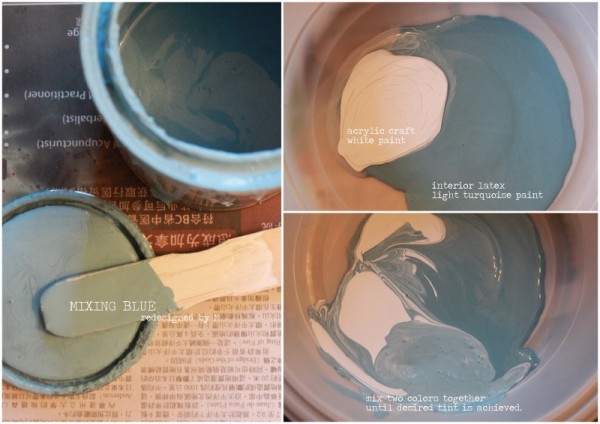
Fun Fact: This blue shown here was used to paint my pantry.
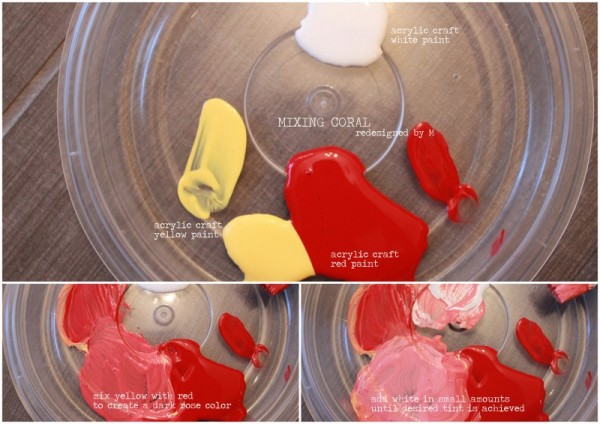
Budget Tip: The acrylic craft paints you see here were sourced from Dollar Tree.
No need to shell out big bucks for paint!
I absolutely ADORE how these markers turned out!
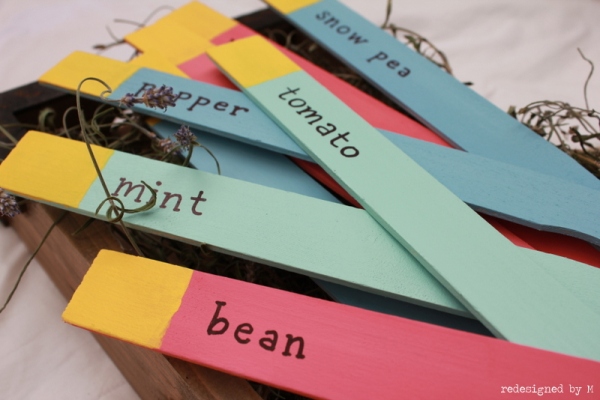
I especially love how the markers add a splash of unexpected color in an otherwise green, brown, and black space. Makes them much easier to spot.
What do you think of my new plant markers made from paint stir sticks? Do you have some fun plant markers of your own to share? Let me know in the comments below!
Total time: It took me a total of 2.5 hours to paint about 15 markers and to mix the colors in between. This does not include dry time.
Total cost: A gallon of the mint green paint cost $9+tax from Home Depot, of which I only used a tiny fraction. I’ll be using this paint for other projects, so I’m not counting this into the total cost of this one. The other paints were already in my collection and paint stir sticks are always free. So my plant markers were all free, free, and free! **Happy dance**
Linking to:
Living Well, Spending Less
Made In A Day
A Blossoming Life
DIY Show Off
Tatertots & Jello
Nifty Thrifty Things
52 Mantels
All Things With Purpose
The Shabby Nest
Design, Dining, & Diapers
Chic On A Shoestring Budget
I Gotta Try That
C.R.A.F.T.
Skip To My Lou
Keeping It Simple
Coastal Charm
Twigg Studios
Home Stories A to Z
Elizabeth & Co
Homework
The Blackberry Vine
The Dedicated House
Twelve O Eight
The Charm of Home
Posted by Redesigned By M on July 10, 2013
https://redesignedbym.wordpress.com/2013/07/10/repurposed-diy-plant-markers/

See this photo? Not a fan.
I really, really, REALLY try not to constantly put my two cents into how people organize their closets (I mean, I literally can’t talk to that person anymore lest I blurt it out next time I see them), but it’s oh so difficult to keep my mouth shut sometimes!
Does anyone realize how easy it is to prevent Floppy Boots Disorder (FBD)?
If I say something, does that make me an annoying busy-body know-it-all? If I say nothing, will this disorder cause contagion? Will FBD ever stop if I say nothing??? This, I ask you!
Firstly, the retail stores actually sell these products call boot shapers. And they’re really pretty awesome. Have a look:
Boot shapers are molded plastic forms that fit inside the leg of your boots to keep them standing upright and formed. They’ll expand to the shape of the leg, so no need to worry if you feel one pair of boots have bigger calves than the next pair of boots. They even have hangers attached to them so you can choose to hang your boots on a rod, off the floor. You know what the downside of these boot shapers are? They’re a bit expensive. Like, $15-$20 per pair expensive. The cost can add up if you have several pairs of boots, like I have.
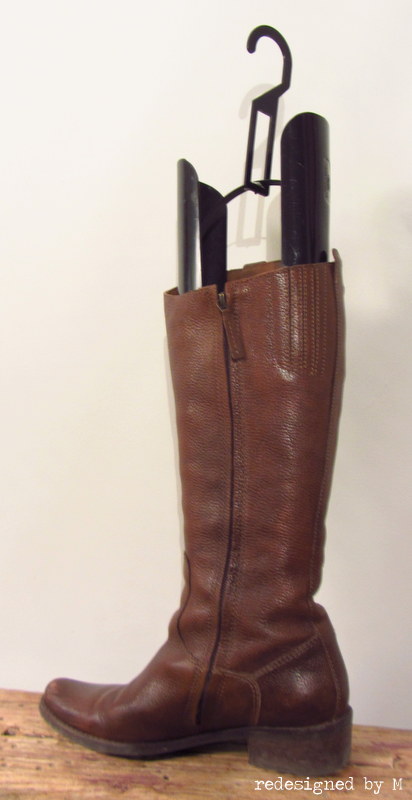
So why not try a few other alternatives that are easier on your wallet and the environment? Repurpose the following (very effective) items to keep those boots shapely and upright when stored in the closet:
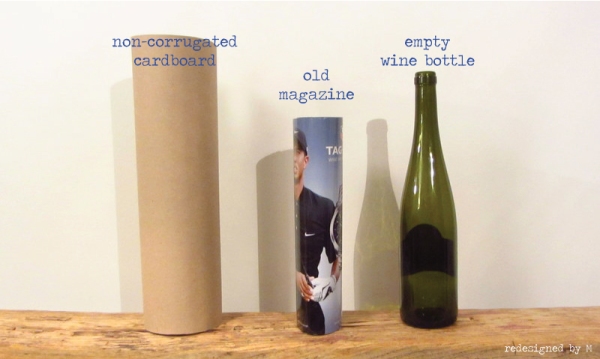
Boom! Mind blown, right? Insert any of these items into your boot(s) and your FBD will be remedied. [Cardboard and magazine will have to be rolled up.]
Here’s a recap (and just because I wanted to make a graphic):
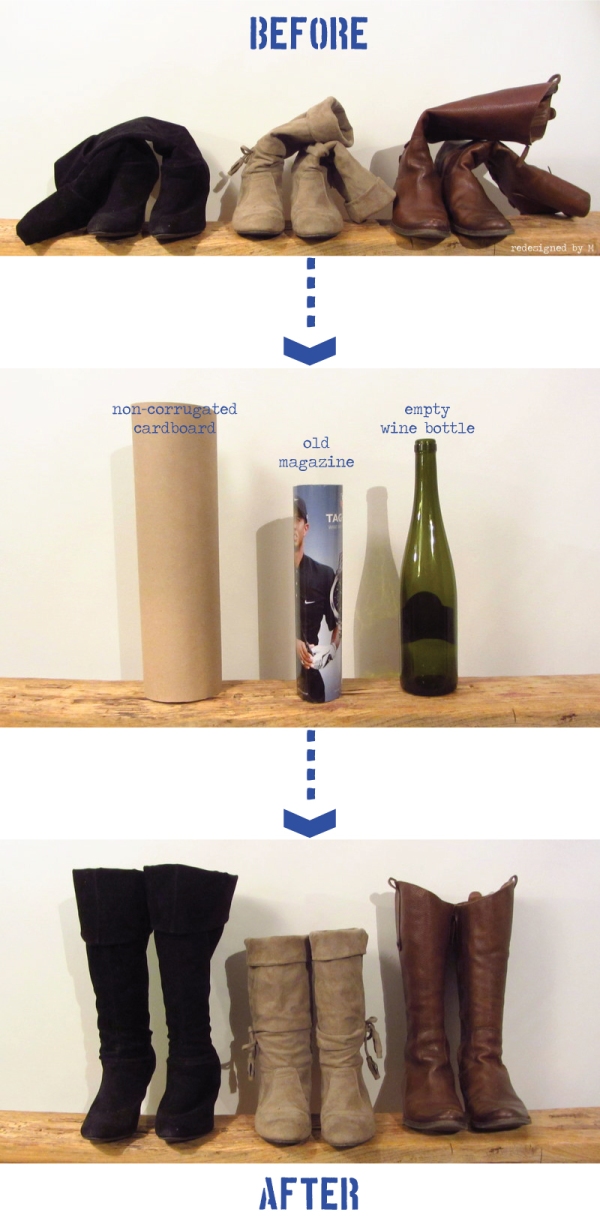
Would it be highly cocky of me to say, “You’re welcome,” at this point? Yes? OK. How about I end this with, “Hope that helps!”
*wink*
Posted by Redesigned By M on June 12, 2013
https://redesignedbym.wordpress.com/2013/06/12/repurposed-prevent-floppy-boot-disorder/

