

This post has moved to my new site at Planq Studio. Please visit me there to find out how to make this fun project and get inspiration for loads of other projects too!
This post has moved to my new site at Planq Studio. Please visit me there to find out how to make this fun project and get inspiration for loads of other projects too!
Posted by Redesigned By M on September 30, 2013
https://redesignedbym.wordpress.com/2013/09/30/redesigned-usa-hoodie/

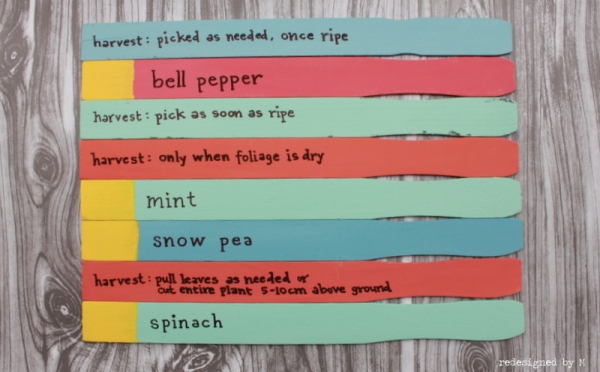
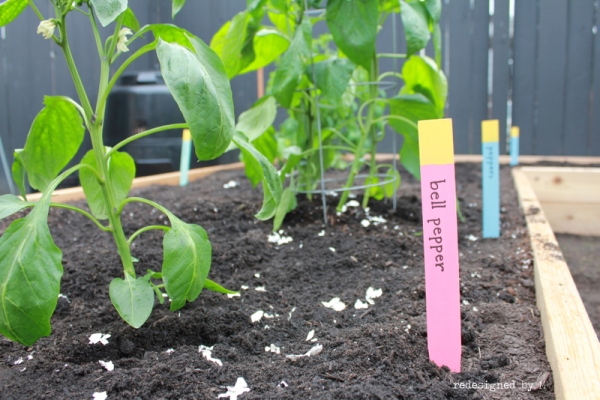
After my vegetable beds were built (see the posts here and here for details), I set about planting some vegetables to fill the beds. Of course, planting crops meant I needed a way to identify them so this called for a DIY project for some plant markers. I used some items I had readily available around the house, which made these markers absolutely free and upcycled. Ahhh… my favorite type of project!
Here are the instructions:

It was important to me to have some sort of instruction on how to harvest the plants on the marker somewhere as I won’t be the only person tending the garden. (We also have rental tenants in our basement unit who will have access to the veggies; and don’t forget my husband gets to pick them as well!)
As I wanted my plant markers in pastel colors, I had to customize a couple of my own colors. The mint green color was found at Home Depot in the mistints section, so I’m sorry I don’t have a tutorial on how to mix that color.
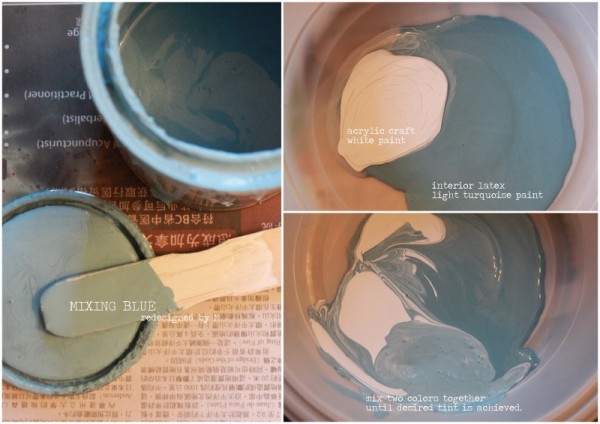
Fun Fact: This blue shown here was used to paint my pantry.
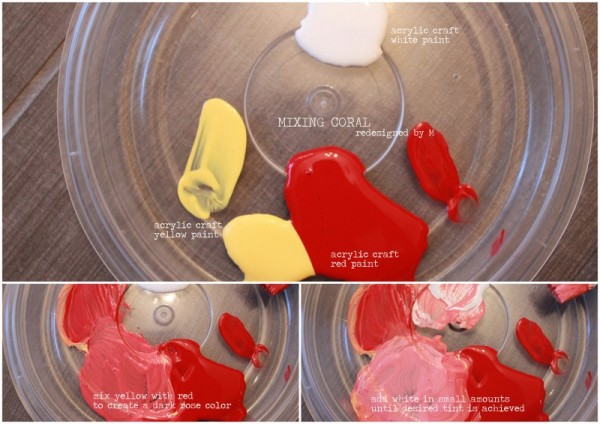
Budget Tip: The acrylic craft paints you see here were sourced from Dollar Tree.
No need to shell out big bucks for paint!
I absolutely ADORE how these markers turned out!
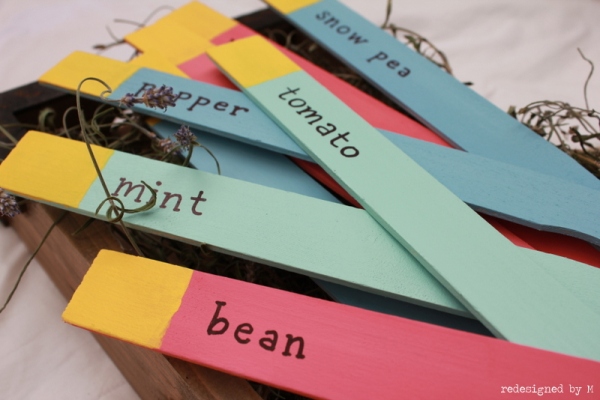
I especially love how the markers add a splash of unexpected color in an otherwise green, brown, and black space. Makes them much easier to spot.
What do you think of my new plant markers made from paint stir sticks? Do you have some fun plant markers of your own to share? Let me know in the comments below!
Total time: It took me a total of 2.5 hours to paint about 15 markers and to mix the colors in between. This does not include dry time.
Total cost: A gallon of the mint green paint cost $9+tax from Home Depot, of which I only used a tiny fraction. I’ll be using this paint for other projects, so I’m not counting this into the total cost of this one. The other paints were already in my collection and paint stir sticks are always free. So my plant markers were all free, free, and free! **Happy dance**
Linking to:
Living Well, Spending Less
Made In A Day
A Blossoming Life
DIY Show Off
Tatertots & Jello
Nifty Thrifty Things
52 Mantels
All Things With Purpose
The Shabby Nest
Design, Dining, & Diapers
Chic On A Shoestring Budget
I Gotta Try That
C.R.A.F.T.
Skip To My Lou
Keeping It Simple
Coastal Charm
Twigg Studios
Home Stories A to Z
Elizabeth & Co
Homework
The Blackberry Vine
The Dedicated House
Twelve O Eight
The Charm of Home

Posted by Redesigned By M on July 10, 2013
https://redesignedbym.wordpress.com/2013/07/10/repurposed-diy-plant-markers/
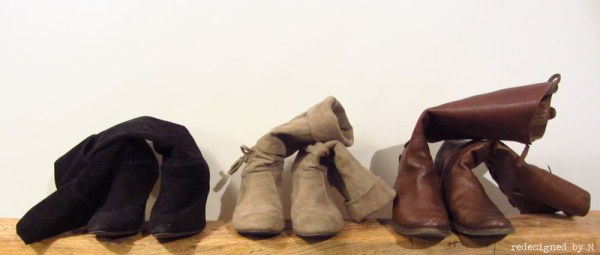
See this photo? Not a fan.
I really, really, REALLY try not to constantly put my two cents into how people organize their closets (I mean, I literally can’t talk to that person anymore lest I blurt it out next time I see them), but it’s oh so difficult to keep my mouth shut sometimes!
Does anyone realize how easy it is to prevent Floppy Boots Disorder (FBD)?
If I say something, does that make me an annoying busy-body know-it-all? If I say nothing, will this disorder cause contagion? Will FBD ever stop if I say nothing??? This, I ask you!
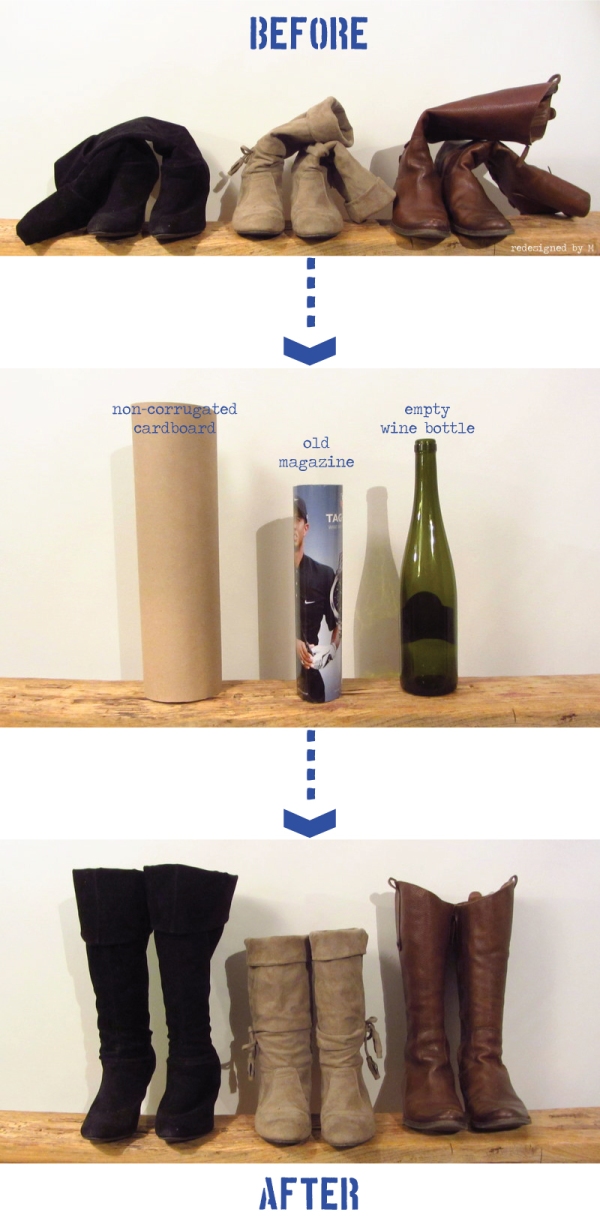
Firstly, the retail stores actually sell these products call boot shapers. And they’re really pretty awesome. Have a look:
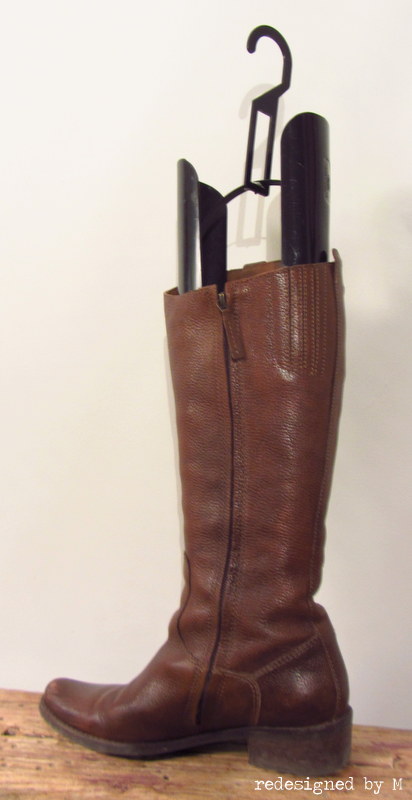
Boot shapers are molded plastic forms that fit inside the leg of your boots to keep them standing upright and formed. They’ll expand to the shape of the leg, so no need to worry if you feel one pair of boots have bigger calves than the next pair of boots. They even have hangers attached to them so you can choose to hang your boots on a rod, off the floor. You know what the downside of these boot shapers are? They’re a bit expensive. Like, $15-$20 per pair expensive. The cost can add up if you have several pairs of boots, like I have.
So why not try a few other alternatives that are easier on your wallet and the environment? Repurpose the following (very effective) items to keep those boots shapely and upright when stored in the closet:
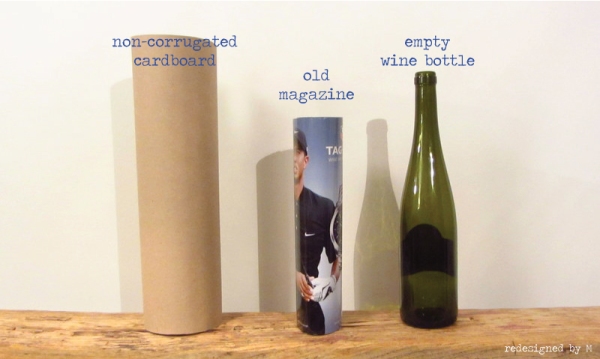
Boom! Mind blown, right? Insert any of these items into your boot(s) and your FBD will be remedied. [Cardboard and magazine will have to be rolled up.]
Here’s a recap (and just because I wanted to make a graphic):
Would it be highly cocky of me to say, “You’re welcome,” at this point? Yes? OK. How about I end this with, “Hope that helps!”
*wink*
Posted by Redesigned By M on June 12, 2013
https://redesignedbym.wordpress.com/2013/06/12/repurposed-prevent-floppy-boot-disorder/
![]()
Inspired by all the photo challenges out there, I thought I’d create one of my own. This photo challenge is two parts:
1. Being my own stylist for a photo shoot.
2. Learning how to use my camera to its fullest extent.
I love styling photo shoots. It infuriates me when I look at photos and see details that were overlooked during the photography session. I wanted to create instances that I could hone my skills and eye for styling, that were more formal, more elaborate, and more visual than my day to day blog posts.
As for the second point: I love doing my Photo Walks, but those are mostly centered around outdoor photos because they involve getting to know my new city better. I thought if I could create my own shoots that I could style, I’d be able to have more practice with interior photography.
I pitched the idea to my blogging buddy, Ginny, of redlovinpixie, who loved it and agreed to take part in the challenge with me! I was more than happy to do this on my own, but it’ll be so much more fun to have her involved as it’ll be fun to see how we both perceive the same subjects. Having said that, anyone is welcome to participate in this challenge with us. The more, the merrier!
Here’s how it works:
1. No editing can be done to the photo other than edge cropping.
2. Camera equipment and tools of any variety may be used to assist in the photography.
3. Select 1-5 of your best photos, of the same subject matter, to be blogged.
4. The same concept must be blogged at the same time by all participants.
5. The only text acceptable for each photo is your watermark.
6. All shoots must be newly styled as of the first Monday of June 2013.
Once a month, on the first Monday.
7. Chaos
(Caveat: Must use at least 3 of the objects from “Order” photo shoot.)
10. Light
11. Living Room
12. Personal
*All concepts are open to interpretation of the photographer.
We have this month to think of ideas for our first concept and then we post our first photo shoot on July 1st! We’re both very excited about this new challenge and hope you will be, too. If you choose to participate, please let us know in the comment below so we’ll be sure to include your blog in the first post.
In other news…. for those of you who don’t follow me in social media, I wanted to brag share with you about something amazing that happened for my blog this weekend:

Do you see it? My tweet to Style at Home magazine (a leading Canadian home decor magazine) was posted in their July issue! I literally blinked several times to make sure I read it right. I never in a million years dreamed that this tweet would get published, so I’m absolutely over the moon! Thank you, S@H!
Posted by Redesigned By M on June 3, 2013
https://redesignedbym.wordpress.com/2013/06/03/introducing-the-photography-styling-challenge/
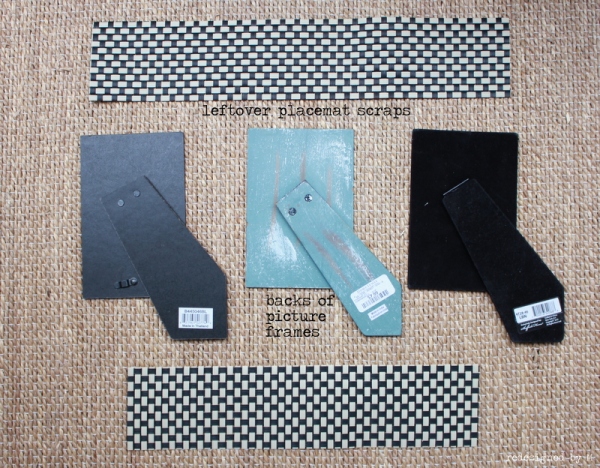
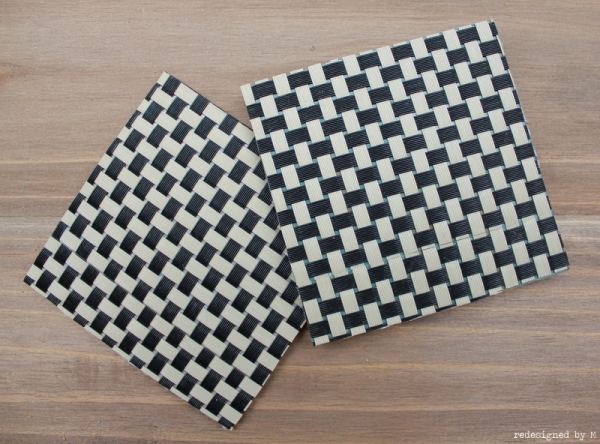
After the thrift store tray I redesigned with a placemat and some spray paint, I had leftover material of the placemat. I decided I could use the scraps to make some coasters. When I looked around for backing material, I found the backs of the picture frames that I took off when I hung my group of frames in the entry. I thought, “Well, I’m not doing anything else with these.”
My supply list included:
Backs of picture frames
Placemat scraps
Hammer
“No Nails” construction adhesive
Scissors
Plastic bumpers
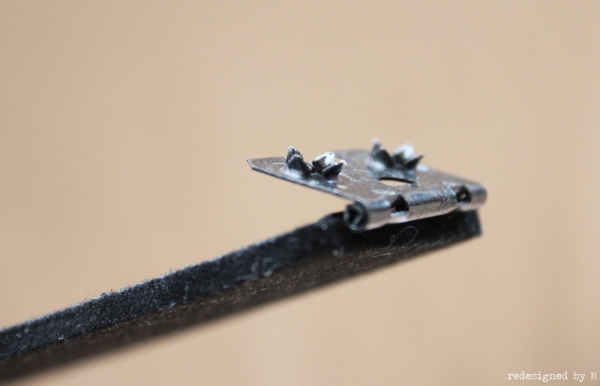
The first step was to separate the easel from the backing board. I had two different types of attachments. The photo above shows a hinge with prong attachments. This was easy to remove. I only pulled on it a bit and it came right off.
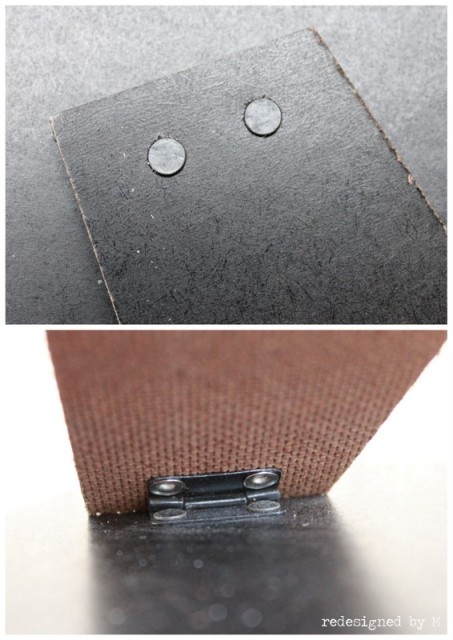
The other type of attachment was a grommet type. This required a bit more time. One of my easels with this attachment was secured so well that I wasn’t able to get it off. (That was the black one on the left.) I gave up on that after about ten minutes of failure. The teal one in the middle had a grommet attachment, but it came off a little easier. All I used was the flat side of the hammer to pry it apart.
Removing the easel was the most difficult part. The next steps were:
Here’s another idea for a repurposed coaster – and it’s MUCH easier than the project showcased above.
Take any 4×4 ceramic tile and add plastic bumpers to the corners. You can also use felt scraps, cut to 4×4 and glued on; or adhesive backed sheets of cork, cut to full size of tile. Another coaster lining you can use is felt furniture protectors with adhesive backs. Those work well also.

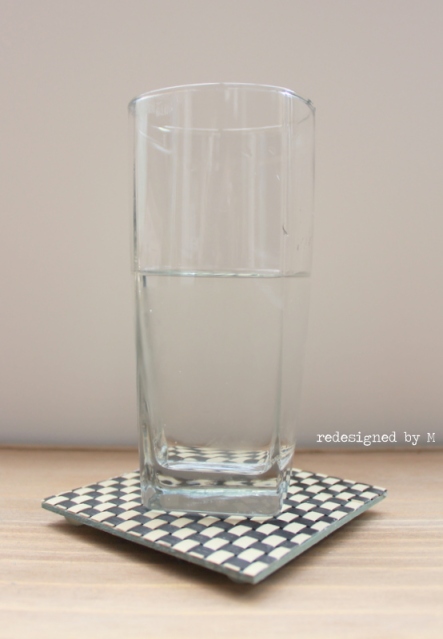
Tiles are a great option to turn into coasters. They look especially good if you have a set of designs or patterns. The ones above are ceramic tiles I picked up many, many years ago. I still use them today.
Total time: Placemat coasters took about 10-15 minutes for each coaster. The bulk of the time was spent in removing the easels. The tile coasters took a minute for all of the five shown, if you use plastic bumpers. It might take a minute for each tile if you use felt or cork liners, as that requires cutting.
Total cost: Nothing, since I used random materials from around the house.
Posted by Redesigned By M on May 29, 2013
https://redesignedbym.wordpress.com/2013/05/29/repurposed-diy-coasters/

